 Kia Optima: Replacement (With EPB)
Rear brake pads
| 1. |
Remove the rear wheel & tire. |
| 2. |
Connect the GDS to the data link
connector located underneath the dash panel. |
| 3. |
Ignition "ON" & Engine "OFF". |
| 4. |
Release the electric parking
brake. |
| 5. |
Select vehicle name and EPB system. |
| 6. |
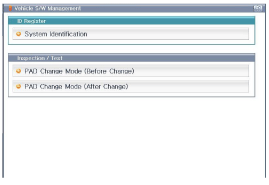
Select the “PAD change mode (Before
pad change)”.
|
| 7. |
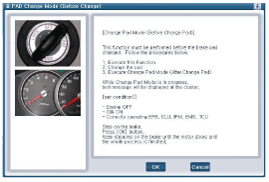
Perform the " PAD change mode
(Before pad change)" procedure with GDS.
|
When disengaging while the motor is in operation, be sure to press
down on the brake pedal. |
|
| 9. |
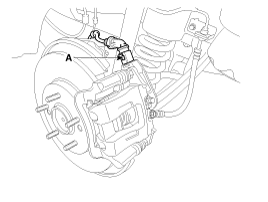
Disconnect the electric parking
brake actuator connector (A).
|
| 10. |
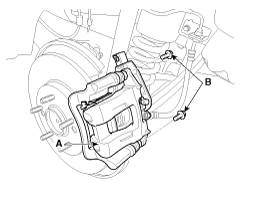
Loosen the guide rod bolts (B)
and then remove caliper body (A).
|
| 11. |
Replace pad retainers (C) and
brake pads (B) in the caliper carrier (A).
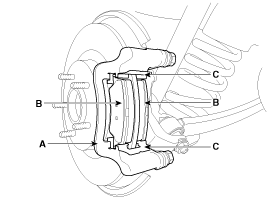
|
| 12. |
Use a SST (09581-11000) when
installing the brake caliper assembly.
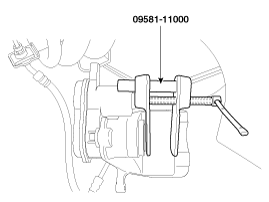
|
Make sure that the piston groove (B) is rotated 10° and faces the
marking (A) on the housing as shown in the diagram.
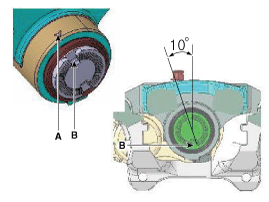
|
|
| 13. |
Place the caliper body (A) on
the caliper carrier and tighten the guide rod bolts (B).
Tightening torque:
21.6 ~ 31.4 N.m (2.2 ~ 3.2 kgf.m, 15.9 ~ 23.1 lb-ft)
|

|
Assemble the caliper body so that the piston groove (A) is in-line
with the pad center lobe (B).
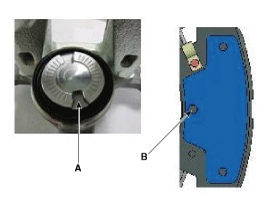
* Make sure that the piston and pad are tightly attached. |
|
| 14. |
Connect the electric parking
brake actuator connector (A).

|
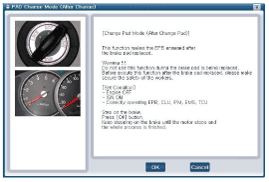
| 16. |
Select the “PAD change mode (Before
pad change)”.

|
| 17. |
Perform the " PAD change mode
(Before pad change)" procedure with GDS.
| 1. |
Check that the
parking brake operates normally. |
|
|
When you activate the EPB for the first time after you change the
brake pad, be sure to press down on the brake pedal. |
|
| 18. |
IGN switch “OFF” and remove the
GDS. |
| 19. |
Install the rear wheel & tire.
Tightening torque:
88.3 ~ 107.9 N.m (9.0 ~ 11.0 kgf.m, 65.1 ~ 79.6 lb-ft)
|
|
Rear brake pads
1.
Loosen the guide rod bolt (B)
and pivot the caliper (A) up out of the way.
Tightening torque:21.6
~ 31.4 N.m (2.2 ~ 3.2 kgf.m, 15.9 ~ 23.1 lb-ft)
...
Rear Brake Disc Thickness Check
1.
Check the brake pads for wear
and fade.
2.
Check the brake disc for damage
and cracks.
3.
Remove all rust and contam ...
See also:
How does the air bag system operate
Air bags are activated (able to inflate if necessary) only when the ignition
switch is turned to the ON or START position.
Air bags inflate instantly in the event of serious frontal or side co ...
Glove Box
To open the glove box door, pull the latch toward you. The glove box door can
be locked (and unlocked) with the vehicle key.
WARNING
To reduce the risk of injury in case of an accident or s ...
Adjusting the height of front seat cushion
Front height of front seat cushion
Move the front portion of the control knob up to raise or down to lower the front
part of the seat cushion.
Rear height of front seat cushion
Move the rear ...
 Kia Optima: Replacement (With EPB)
 Replacement (Without EPB)
 Inspection


